Welcome to the world of loom bracelet making! With comprehensive guides and step-by-step tutorials, you can create stunning designs, from simple to intricate patterns, suitable for all skill levels.
What is a Loom Bracelet?
A loom bracelet is a type of jewelry made by weaving rubber bands or threads on a loom tool. It involves looping and securing bands to create vibrant, customizable designs. Using a loom allows for precise patterns, from simple styles to intricate designs. Popular tools like the Rainbow Loom simplify the process, making it accessible for crafters of all ages. Loom bracelets can be personalized with beads or other embellishments, offering endless creativity and versatility for unique accessories.
Benefits of Using a Loom for Bracelet Making
Using a loom for bracelet making offers precision and control, allowing you to create intricate patterns with ease. It simplifies the process, making it accessible for crafters of all skill levels. The loom helps maintain consistent tension, ensuring a professional finish. Additionally, it enables the creation of complex designs that would be challenging to achieve by hand. With a loom, you can efficiently weave rubber bands, threads, or beads into beautiful, customizable bracelets. This tool is especially great for beginners, as it provides a structured guide to learning various techniques.

Materials and Tools Needed
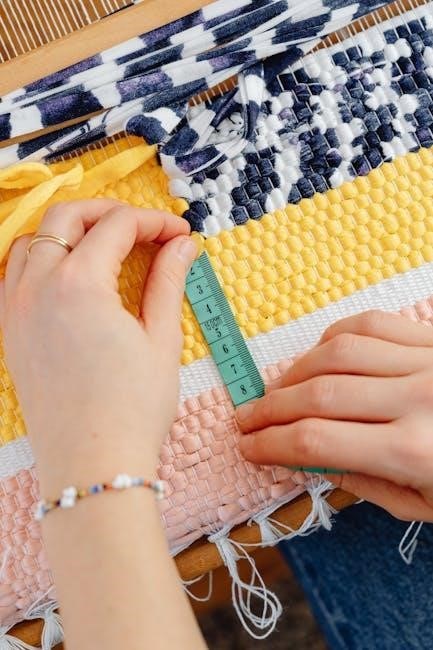
Essential tools include a loom, rubber bands, a hook, measuring tape, and a clipboard. Beads and charms are optional for added customization.
Basic Supplies for Loom Bracelet Making
To get started, you’ll need a loom, rubber bands in various colors, a hook, and measuring tape. Optional items include beads and an S-clip for finishing. The loom serves as the base for weaving, while the hook helps loop and secure bands. Rubber bands come in diverse colors and sizes, allowing for creativity. Beads can add texture and design, and an S-clip ensures a secure closure. These supplies are widely available and suitable for both beginners and experienced crafters, making loom bracelet making an accessible and enjoyable hobby.
Optional Materials for Advanced Designs
For intricate designs, consider adding beads, sequins, or metallic bands to your projects. Beads can add texture and visual interest, while sequins provide a sparkly finish. Metallic bands offer a modern look and can elevate your bracelet’s appearance. Additionally, pattern books or downloadable PDF guides are invaluable for exploring complex designs. These resources often include detailed diagrams and step-by-step instructions for advanced techniques. With these optional materials, you can experiment with unique styles, creating one-of-a-kind pieces that showcase your creativity and skill in loom bracelet making.

Step-by-Step Guide to Making a Basic Loom Bracelet
Learn to craft a simple loom bracelet by setting up your loom, placing bands, and looping them securely. Follow clear, visual instructions for a perfect finish.

Setting Up Your Loom
Begin by positioning your loom with the Tab end facing you. Refer to the Place Pattern diagram to correctly set the pegs. Start with a slip knot on the first peg to secure your bands. Ensure each peg has only one band, following the pattern closely. After placing all bands, flip the loom to loop them. Always double-check for a slip knot before removing the bracelet. This setup ensures a sturdy foundation for your design. Properly securing the bands from the start guarantees a neat and professional finish. Avoid missing any pegs to maintain even tension throughout the bracelet.
Placing Bands on the Loom
Start by placing a single band on each peg, following the pattern diagram. Ensure each band is snug and properly aligned. To avoid tangles, loop bands over two fingers, crossed in the middle, and secure them to the pegs. For intricate designs, use the Place Pattern guide to accurately position bands. Maintain consistent tension by gently pulling each band after placement. This method ensures uniformity and prevents misalignment. Properly placing bands is crucial for achieving the desired design and a professional finish. Always refer to the pattern chart for precise placement instructions.
Looping and Securing the Bands
Flip the loom and use a hook or tool to loop the bands from the pegs. Start by picking up the first band and looping it over the adjacent peg. Continue this process, moving across the loom to create the desired pattern. Once all bands are looped, tie the end with a slip knot to secure the bracelet. For a polished finish, connect the two ends using an S-clip. Always ensure a slip knot is in place before removing the bracelet from the loom. Proper looping and securing ensure a durable and professional-looking design.

Advanced Loom Bracelet Patterns
Explore intricate designs, such as the hexafish pattern or multiband creations, to elevate your bracelet-making skills. Incorporate beads, complex loops, and advanced techniques for truly unique pieces.
Creating Complex Designs with Multiple Bands
Mastering multi-band designs opens up endless possibilities for intricate patterns. Use different colored bands and layering techniques to create visually striking bracelets. Start by setting up your loom with multiple rows, then weave bands in alternating directions for a 3D effect. Experiment with crossover patterns and interlocking loops to add depth and texture. For inspiration, refer to PDF guides that detail advanced methods, ensuring your designs stand out with professional finishes.
Incorporating Beads into Your Bracelet
Add a personal touch to your loom bracelets by incorporating beads. Start by selecting beads that complement your design, such as seed beads or decorative beads. Thread beads onto rubber bands before looping them onto the loom. For precise placement, use a needle or pick to guide beads into position. Experiment with spacing—try evenly distributing beads or clustering them for visual interest. Ensure proper tension to keep beads secure. For advanced techniques, refer to PDF guides that offer detailed instructions for bead integration, ensuring a polished and professional finish.

Troubleshooting Common Issues
Identify misplaced bands and gently adjust their position using a pick or needle. Ensure proper alignment to avoid misshapen loops. Patience is key to achieving a flawless design.
Fixing Misplaced Bands and Loops
Identify misplaced bands by gently lifting and repositioning them using a pick or needle. Excess bands can be carefully removed without unraveling previous work. To correct loops, ensure bands are evenly aligned on the pegs. If a loop is too loose or tight, adjust the tension by sliding the band slightly. Regularly inspect your work to catch misalignments early. For severe errors, it may be necessary to restart the section. Patience and attention to detail are key to achieving a smooth, professional finish.
Adjusting Tension for a Perfect Fit
To achieve the ideal fit, gently pull the bands while weaving to ensure even tension. Avoid over-tightening, which can cause discomfort. If the bracelet feels too loose, carefully tighten the bands using a pick. For a snug fit, adjust the bands symmetrically across the loom. After completing the bracelet, slide it off the loom and stretch it slightly to ensure flexibility. Proper tension ensures comfort and durability, making your loom bracelet both stylish and long-lasting.

Additional Resources and Tutorials
Explore free downloadable PDF guides and video tutorials for loom bracelet making. These resources offer detailed step-by-step instructions for various designs, from basic to advanced patterns.
Free Printable Loom Band Instructions
Discover a wide range of free printable loom band instructions online, perfect for both beginners and experienced crafters. These guides offer step-by-step visuals and clear explanations, making it easy to create stunning bracelets. From simple designs like the classic rainbow bracelet to complex patterns, there’s something for everyone. Many websites provide PDF downloads with detailed diagrams, ensuring you can follow along effortlessly. Whether you’re making a charm bracelet or exploring intricate beadwork, these printable instructions are a great resource to help you master the craft. They’re also ideal for sharing with friends or teaching others!
Recommended PDF Guides for Beginners
Start your loom bracelet journey with recommended PDF guides designed specifically for beginners. These guides offer clear step-by-step instructions and visuals to help you master the basics. Perfect for skill-building, they include projects like the hexafish bracelet and other popular designs. Many PDFs are available for free or at a low cost, providing detailed patterns and tips to ensure success. Whether you’re new to looming or looking to refine your skills, these guides are an excellent resource to help you create beautiful bracelets with confidence and precision.