
Article Plan: Emanualonline Hearivo Manual PDF
Discover a comprehensive guide to the Hearivo manual, readily available as a PDF download from Emanualonline, offering detailed instructions and troubleshooting assistance.
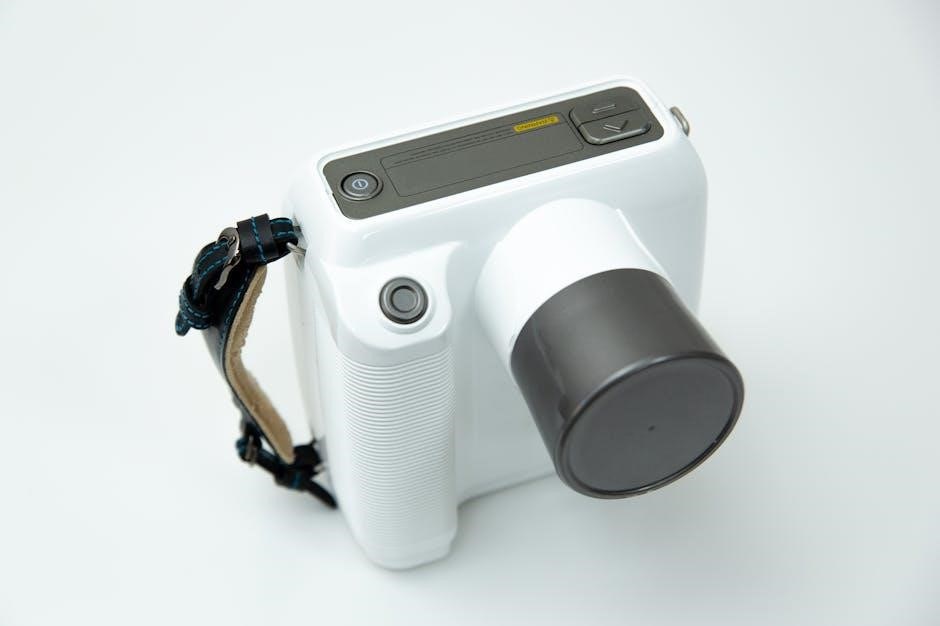
Hearivo is a powerful software solution designed for audio recording and transcription, catering to a diverse range of users from students and journalists to professionals needing accurate voice-to-text conversion. This introduction will briefly outline Hearivo’s core functionalities and its significance in modern digital workflows. The software aims to streamline the process of capturing audio, converting it into text, and managing these files efficiently.
Emanualonline serves as a central repository for Hearivo’s official documentation, including the comprehensive manual available in PDF format. This manual is an invaluable resource for both novice and experienced users, providing step-by-step instructions, troubleshooting guides, and detailed explanations of all features. Accessing the manual through Emanualonline ensures users have the most up-to-date information regarding software updates and new functionalities. Understanding Hearivo’s capabilities, coupled with the readily available support from the Emanualonline manual, empowers users to maximize their productivity and achieve optimal results.
What is Hearivo Used For?
Hearivo’s versatility makes it suitable for numerous applications. Primarily, it excels in audio recording, capturing lectures, interviews, meetings, and personal notes with clarity. Beyond recording, Hearivo’s robust transcription services automatically convert spoken words into editable text, saving significant time and effort compared to manual transcription.
Professionals in fields like journalism, law, and medicine utilize Hearivo for accurate record-keeping and documentation. Students benefit from transcribing lectures for study purposes, while researchers can analyze interview data efficiently. The software’s ability to handle various audio formats and deliver high-quality transcriptions makes it a valuable tool across diverse sectors; The Emanualonline manual PDF details these applications, offering tailored guidance for specific use cases. Furthermore, Hearivo aids in accessibility, providing text alternatives for audio content, benefiting individuals with hearing impairments. Ultimately, Hearivo streamlines audio-related tasks, boosting productivity and enhancing workflow efficiency.
Downloading the Hearivo Manual PDF
Accessing the Hearivo manual in PDF format is straightforward through Emanualonline. Begin by navigating to the Emanualonline website using a web browser. Utilize the search function, entering “Hearivo Manual PDF” to quickly locate the relevant document. Alternatively, browse the software or product directory, filtering for Hearivo resources.

Upon finding the manual, click on the download link. The PDF file will typically download to your computer’s designated download folder. Ensure you have sufficient storage space before initiating the download. The file size is generally manageable, allowing for quick retrieval even with moderate internet speeds. Once downloaded, open the PDF using a compatible reader like Adobe Acrobat Reader. Emanualonline often provides multiple versions of the manual, catering to different Hearivo software iterations. Verify you’ve downloaded the version corresponding to your installed software for optimal compatibility and accurate guidance.
System Requirements for Hearivo
Determining the system requirements for Hearivo is crucial for ensuring optimal performance and compatibility. While specific details vary depending on the Hearivo version, general guidelines apply. Typically, Hearivo functions effectively on Windows 7 or later, including Windows 10 and 11, with macOS versions also supported. A minimum processor speed of 2.0 GHz is recommended, alongside at least 4GB of RAM for smooth operation, though 8GB is preferable for handling larger audio files.
Storage requirements are relatively modest, with approximately 200MB of free disk space needed for installation. A stable internet connection is essential for accessing online features like transcription services. Sound card compatibility is vital, supporting standard audio input and output devices. Emanualonline’s Hearivo manual PDF often details version-specific requirements. Checking the manual before installation prevents potential compatibility issues and ensures a seamless user experience. Consider these factors to maximize Hearivo’s capabilities.

Installing Hearivo Software (If Applicable)
The installation process for Hearivo, if software-based, is generally straightforward. Begin by downloading the installer from a trusted source, ideally the official Emanualonline website or a verified partner. Double-click the downloaded file to initiate the setup wizard. Follow the on-screen prompts, carefully reviewing the license agreement before accepting. Choose an installation directory; the default location is usually sufficient.
During installation, you may be prompted to select components. Opt for a complete installation to ensure all features are included. The installer may also request permissions to access your microphone and audio devices – grant these permissions for full functionality. Once the installation is complete, a Hearivo shortcut will likely appear on your desktop. Emanualonline’s Hearivo manual PDF provides step-by-step visual guides. After installation, launch the software and proceed with initial setup and configuration as outlined in the manual.
Initial Setup and Configuration
Upon launching Hearivo for the first time, a setup wizard will guide you through essential configurations. This typically involves selecting your preferred audio input and output devices – microphone and speakers/headphones. Ensure the correct devices are chosen for optimal recording and playback quality. The wizard may also prompt you to adjust microphone sensitivity and volume levels; test these settings to ensure clear audio capture.
Next, configure any desired transcription settings, such as language preferences and output formats. Explore options for automatic noise reduction and audio enhancement. Emanualonline’s Hearivo manual PDF details each setting. User account creation or login may be required to access certain features or cloud-based services. Finally, review the privacy settings and customize notifications to your preferences. Proper initial setup is crucial for a seamless Hearivo experience, as detailed in the downloadable manual.
Understanding the Hearivo Interface
Hearivo’s interface is designed for intuitive operation, centering around a main window with clearly labeled sections. The top menu bar provides access to core functions like file management, editing tools, and settings. A prominent recording control panel allows for easy start, stop, and pause of audio capture. The central workspace displays waveforms and transcription text, depending on the active mode.
Below the recording controls, you’ll find toolbars for audio enhancement, noise reduction, and playback adjustments. Emanualonline’s Hearivo manual PDF provides a detailed visual guide to each element. The status bar at the bottom displays real-time information about recording levels, file size, and processing status. Familiarizing yourself with these components, as outlined in the manual, will significantly enhance your workflow and unlock Hearivo’s full potential.
Navigating the Main Menu
The Hearivo main menu, detailed within the Emanualonline manual PDF, organizes functionalities into logical categories. “File” encompasses options for creating new projects, opening existing recordings, saving progress, and exporting audio in various formats. “Edit” provides tools for trimming, splitting, and manipulating audio segments, alongside advanced features like noise reduction and equalization.
“View” controls the interface display, allowing customization of the waveform view, transcription window, and toolbar visibility. The “Tools” menu houses specialized functions like voice activation and automatic transcription. “Settings” grants access to global preferences, including audio input/output devices, recording quality, and software updates. Referencing the manual’s screenshots ensures efficient navigation and understanding of each menu item’s purpose, maximizing your control over Hearivo’s capabilities.
Customizing the User Interface
The Emanualonline Hearivo manual PDF details extensive UI customization options. Users can adjust the color scheme for improved visibility and comfort, choosing from pre-defined themes or creating personalized palettes. Toolbar layouts are configurable, allowing users to pin frequently used functions for quick access, streamlining workflow efficiency. Waveform display settings offer control over zoom levels, color gradients, and detailed analysis views.
Font sizes and styles are adjustable throughout the application, enhancing readability for transcription and editing tasks. The manual illustrates how to resize and reposition windows, creating a workspace tailored to individual preferences and screen resolutions. Furthermore, keyboard shortcuts can be redefined, enabling personalized control over common actions. Mastering these customization features, as outlined in the PDF, significantly enhances the user experience and productivity within Hearivo.
Core Features of Hearivo
According to the Emanualonline Hearivo manual PDF, the software boasts robust audio recording functionality, supporting multiple input devices and formats. Users can capture audio directly within the application, with adjustable recording quality settings to balance file size and fidelity. The manual details options for noise reduction and audio enhancement during recording, ensuring clear and professional-sounding results.
A key feature is Hearivo’s integrated transcription services. The software automatically converts audio recordings into text, utilizing advanced speech recognition technology. The PDF explains how to refine transcriptions, correct errors, and export text in various formats; Furthermore, Hearivo supports speaker identification and time-stamping, facilitating accurate and organized transcript creation. These core features, thoroughly documented in the manual, position Hearivo as a powerful tool for audio professionals and researchers.
Audio Recording Functionality
The Emanualonline Hearivo manual PDF extensively covers the software’s audio recording capabilities. It details support for diverse input sources, including microphones, line-in connections, and USB audio interfaces. Users can select specific input devices and adjust recording levels directly within the application. The manual provides guidance on optimizing audio settings for different recording scenarios, such as voiceovers, interviews, or musical performances.

Hearivo offers various recording formats, including WAV and MP3, with customizable bitrates and sample rates. The PDF explains how to utilize built-in noise reduction filters to minimize background interference and enhance audio clarity. Additionally, the manual illustrates techniques for monitoring audio levels in real-time, preventing clipping and distortion. Detailed instructions are provided for starting, pausing, and stopping recordings, ensuring a seamless and efficient workflow.

Transcription Services
The Emanualonline Hearivo manual PDF thoroughly explains the integrated transcription services. It details how to automatically convert recorded audio into text format, significantly reducing manual effort. The manual clarifies supported languages for transcription and outlines the accuracy levels users can expect; It also provides instructions on utilizing the software’s editing tools to refine transcribed text, correcting any errors or inconsistencies.

Hearivo’s transcription feature allows users to export transcripts in various formats, including TXT, DOCX, and SRT, facilitating integration with other applications. The PDF guides users through customizing transcription settings, such as speaker identification and punctuation rules. Furthermore, it explains how to leverage the software’s cloud-based transcription engine for faster processing and improved accuracy; Detailed steps are provided for uploading audio files and initiating the transcription process, ensuring a streamlined experience.
Troubleshooting Common Issues
The Emanualonline Hearivo manual PDF dedicates a substantial section to resolving frequently encountered problems. It systematically addresses audio input issues, guiding users through checks of microphone connections, volume levels, and driver configurations. For software crashes and errors, the manual provides detailed steps for generating error logs and submitting them to Hearivo support. It also includes solutions for common error messages, explaining their causes and offering practical fixes.
Users will find guidance on resolving recording quality problems, such as distortion or background noise, with recommendations for optimizing recording environments. The manual outlines procedures for troubleshooting playback issues, including distorted audio or complete silence. Additionally, it covers potential conflicts with other software and suggests solutions for resolving them. A dedicated FAQ section within this troubleshooting guide addresses common user queries, ensuring a self-service approach to problem-solving.
Audio Input Problems
The Emanualonline Hearivo manual PDF provides extensive troubleshooting for audio input issues. It begins with verifying physical connections – ensuring microphones are securely plugged into the correct ports. Users are guided through operating system sound settings, checking if Hearivo is selected as the default recording device. The manual details how to adjust microphone volume levels within both the operating system and Hearivo itself, preventing excessively low or distorted recordings.
Further assistance covers driver-related problems, instructing users on how to update or reinstall audio drivers. It addresses scenarios where Hearivo doesn’t detect a microphone, suggesting compatibility checks and alternative microphone options. The manual also includes a section on resolving background noise issues, recommending noise suppression features within Hearivo and optimal recording environments. Finally, it offers solutions for resolving issues with specific microphone types, like USB or XLR microphones.
Software Crashes and Errors
The Emanualonline Hearivo manual PDF dedicates a significant section to addressing software crashes and errors. It begins with basic troubleshooting steps, such as restarting the application and the computer. Users are guided through checking system resource usage – CPU, RAM, and disk space – to identify potential bottlenecks causing instability. The manual details how to interpret error messages, providing specific solutions for common codes.
It also covers the importance of software updates, explaining how to download and install the latest version of Hearivo to benefit from bug fixes and performance improvements. Instructions are provided for performing a clean reinstall of the software, removing all associated files and settings. The manual advises users on how to create and review system logs to pinpoint the cause of crashes, and offers guidance on contacting Hearivo support with detailed error reports. Finally, it addresses compatibility issues with other software.

Advanced Settings and Options
The Emanualonline Hearivo manual PDF delves into the advanced settings and options available within the software, catering to experienced users seeking granular control. It details customization of audio recording parameters, including sample rates, bit depths, and channel configurations, optimizing for specific recording scenarios. Users learn to configure advanced noise reduction and audio enhancement algorithms for superior sound quality.

The manual explains options for customizing transcription settings, such as language selection, accent preferences, and vocabulary training, improving transcription accuracy. It covers advanced scheduling features for automated recordings and transcriptions. Furthermore, it details integration options with other applications and services, enabling seamless workflows. The PDF provides instructions on configuring data export formats and security settings, ensuring data privacy and compatibility. Finally, it explains how to access and modify the software’s configuration files directly.
Data Backup and Recovery
The Emanualonline Hearivo manual PDF emphasizes the critical importance of data backup and recovery, outlining several strategies to safeguard valuable recordings and transcriptions. It details automated backup scheduling options, allowing users to regularly create copies of their data to local drives, network locations, or cloud storage services. The manual provides step-by-step instructions for performing manual backups, ensuring users can proactively protect their information.

Crucially, it explains the recovery process in case of data loss due to hardware failure, software corruption, or accidental deletion. The PDF details how to restore data from backups, minimizing downtime and data loss. It also covers troubleshooting common backup and recovery issues, such as corrupted backup files or inaccessible storage locations. Additionally, the manual suggests implementing a redundant backup strategy, utilizing multiple backup locations for enhanced data security and resilience. Finally, it advises on verifying backup integrity regularly.
Frequently Asked Questions (FAQ)
The Emanualonline Hearivo manual PDF incorporates a comprehensive FAQ section addressing common user inquiries. One frequent question concerns compatibility with various operating systems; the manual clarifies supported versions of Windows and macOS. Another addresses troubleshooting audio input issues, providing solutions for microphone setup and driver conflicts. Users often ask about transcription accuracy; the FAQ details factors influencing accuracy and offers tips for optimal results.
Regarding the software’s licensing model, the manual explains different subscription options and their associated features. A common query involves exporting recordings in various formats; the FAQ lists supported file types and export settings. The manual also answers questions about data security and privacy, outlining Hearivo’s data handling practices. Furthermore, it provides guidance on resolving software crashes and error messages. Finally, the FAQ section directs users to additional resources, including online tutorials and the Hearivo support portal.
Contacting Hearivo Support
For assistance beyond the Emanualonline Hearivo manual PDF, several support channels are available. The primary method is through the official Hearivo website, featuring a dedicated support portal with a knowledge base and ticketing system. Users can submit detailed inquiries and track their progress online. Email support is also offered, providing a direct line of communication with Hearivo’s technical team; response times typically fall within 24-48 hours.
Live chat support is available during business hours, offering immediate assistance for urgent issues. The Hearivo website lists contact details, including email addresses and phone numbers for specific regions. Social media channels, such as Twitter and Facebook, can be used for quick questions or to report bugs. Before contacting support, it’s recommended to consult the manual’s troubleshooting section and the online FAQ. Providing detailed information about the issue, including operating system and software version, will expedite the resolution process.