
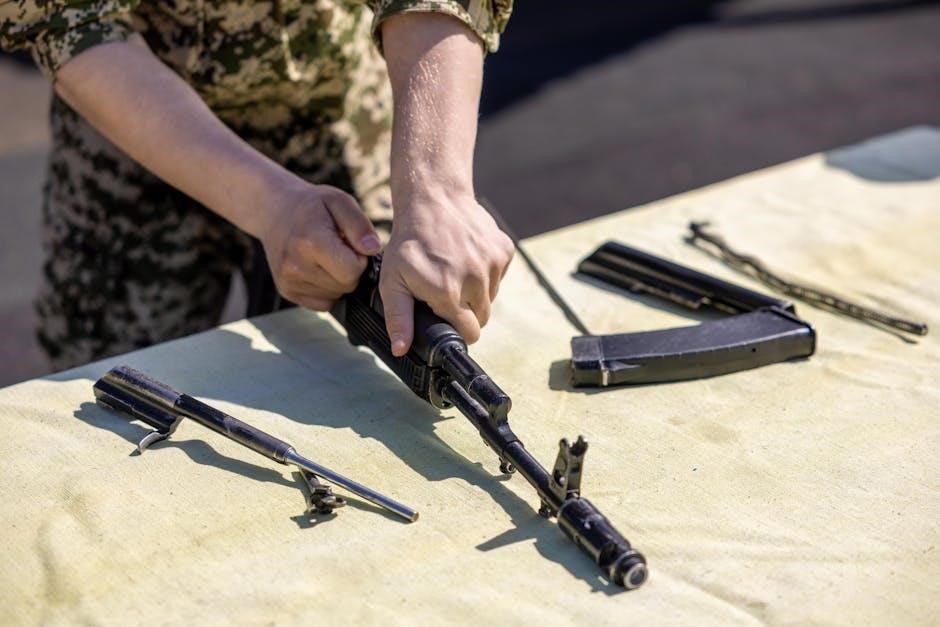
Maintaining rifle accuracy and longevity hinges on consistent‚ proper bore cleaning‚ and utilizing a bore guide ensures efficient solvent application and rod alignment․
A bore guide protects the crown‚ prevents rod-to-rifling contact‚ and streamlines the cleaning process‚ ultimately enhancing your rifle’s performance and lifespan․
Effective cleaning isn’t merely about removing powder residue; it’s a comprehensive process involving copper fouling removal and meticulous attention to detail․
Why Proper Bore Cleaning is Crucial
Consistent and thorough rifle bore cleaning is paramount for maintaining accuracy‚ extending the firearm’s lifespan‚ and ensuring reliable operation․ Neglecting this vital maintenance can lead to copper and powder fouling buildup‚ drastically diminishing performance․
A bore guide plays a critical role in this process‚ safeguarding the delicate crown from damage caused by the cleaning rod․ Preventing contact with the rifling in the throat is also essential‚ and a guide achieves this․
Furthermore‚ proper cleaning prevents corrosion and ensures the rifle functions safely and predictably․ Utilizing a bore guide streamlines the cleaning process‚ making it more efficient and comfortable‚ ultimately encouraging regular maintenance․ It’s a small investment that yields significant returns in terms of accuracy and longevity‚ protecting your firearm investment․
The Role of a Bore Guide
A bore guide serves as a crucial intermediary‚ aligning the cleaning rod with the rifle bore and preventing contact between the rod and the rifling‚ particularly within the throat․ This protection is vital for preserving accuracy and preventing potential damage to the crown․
By providing a stable channel‚ the bore guide facilitates smoother‚ more consistent cleaning rod movement‚ ensuring even solvent distribution and effective fouling removal․ Precision shooters often avoid pulling a brush back through the crown‚ and a guide helps facilitate this․
Ultimately‚ the bore guide enhances cleaning efficiency and comfort‚ encouraging regular maintenance․ It’s a simple tool that significantly improves the cleaning process‚ contributing to a rifle’s longevity and consistent performance․

Essential Tools for Rifle Cleaning
Beyond solvents and brushes‚ a quality bore guide is paramount for safe‚ effective cleaning‚ alongside appropriate rods‚ patches‚ and jags for optimal results․
Cleaning Rods: Materials and Types
Selecting the right cleaning rod is crucial when paired with a bore guide for optimal rifle maintenance․ Rods come in various materials‚ each with distinct advantages․
One-piece rods‚ often made of coated steel or carbon fiber‚ offer superior straightness and minimize bore contact‚ enhancing cleaning precision when used with a guide․
Multi-piece rods provide convenience for transport and storage‚ but require careful assembly to ensure straightness‚ which a bore guide helps mitigate․
Coated rods reduce friction and protect the bore from damage‚ especially important when navigating the rifling with brushes and patches guided by the tool․
Carbon fiber rods are lightweight and non-marring‚ ideal for delicate bores‚ and work seamlessly with a bore guide to prevent crown damage․
Regardless of the material‚ ensure the rod is compatible with your caliber and always use a bore guide to maintain alignment and protect the rifle’s internal components․
Brushes: Bronze‚ Nylon‚ and Stainless Steel
Brushes are essential for dislodging fouling‚ and their effectiveness is amplified when used in conjunction with a bore guide‚ ensuring proper alignment and coverage․
Bronze brushes are the workhorses of rifle cleaning‚ excelling at removing copper and lead fouling‚ but always use a guide to prevent bore damage during aggressive scrubbing․
Nylon brushes are milder‚ ideal for initial solvent application and removing powder residue‚ and a bore guide helps maintain consistent contact with the bore walls․
Stainless steel brushes offer durability and resistance to solvents‚ suitable for stubborn fouling‚ but require a bore guide to avoid scratching the rifling․
When using any brush‚ always work it fully through the bore‚ guided by the tool‚ and avoid reversing direction within the barrel to prevent fouling buildup․
Proper brush selection‚ combined with a bore guide‚ ensures thorough cleaning without compromising the integrity of your rifle’s bore․
Solvents and Lubricants
Solvents dissolve fouling‚ while lubricants protect against corrosion‚ and a bore guide enhances their effectiveness by ensuring even distribution throughout the rifle bore․
Shooter’s Choice and similar solvents effectively remove powder residue‚ but a bore guide prevents solvent bypass around the brush or patch‚ maximizing cleaning power․
For stubborn copper fouling‚ CLR can be utilized‚ but always employ a bore guide to protect the crown and maintain consistent application during the cleaning process․
After cleaning‚ a quality rifle lubricant minimizes friction and prevents rust‚ and a bore guide aids in applying a thin‚ even coat along the bore’s entire length․
Always follow solvent and lubricant manufacturer instructions‚ and remember a bore guide is crucial for safe and effective chemical application within the firearm․
Combining appropriate solvents‚ lubricants‚ and a bore guide guarantees a clean‚ protected‚ and optimally functioning rifle․
Patches and Jags
Patches‚ typically cotton or flannel‚ remove loosened fouling‚ while jags securely hold them for passage through the bore‚ and a bore guide ensures straight‚ consistent patch travel․
Using a bore guide prevents patches from bunching or snagging‚ especially near the chamber and crown‚ leading to a more thorough cleaning process and reduced risk of damage․
Proper patch sizing is crucial; too loose‚ and solvent bypasses occur‚ too tight‚ and excessive friction develops‚ but a bore guide mitigates these issues․
Jags‚ available in various points‚ create a tight seal with the patch‚ maximizing contact with the bore’s surface‚ and a bore guide maintains alignment during use․
Employing a bore guide alongside quality patches and jags guarantees complete solvent and fouling removal‚ contributing to improved accuracy and firearm longevity․
Consistent patch application‚ facilitated by a bore guide‚ is key to a truly clean and well-maintained rifle bore․

Understanding the Rifle Bore
Rifling imparts spin for accuracy‚ while the chamber and throat require careful cleaning; a bore guide protects these areas during rod passage․

Crown protection is paramount‚ and a bore guide prevents rod contact‚ preserving accuracy‚ ensuring a clean and well-maintained firearm․
Rifling and its Importance
Rifling‚ the helical grooves cut into the interior of a firearm’s barrel‚ is fundamentally crucial for achieving accuracy․ These grooves impart a spin to the bullet as it travels down the bore‚ stabilizing its flight and dramatically increasing its range and precision․ Without rifling‚ a bullet would tumble end-over-end‚ resulting in wildly inaccurate shots․
During the cleaning process‚ it’s vital to avoid damaging this delicate rifling․ A bore guide plays a critical role in safeguarding it․ By ensuring the cleaning rod travels straight and true‚ the bore guide prevents the rod from contacting and potentially wearing down the rifling‚ especially in the throat area where wear is most common․
Furthermore‚ a bore guide helps maintain the integrity of the bore’s dimensions‚ preserving the consistent spin imparted to each projectile‚ and ultimately‚ the rifle’s inherent accuracy․ Protecting rifling is paramount for long-term performance․
Chamber and Throat Considerations

The chamber‚ where the cartridge resides before firing‚ and the throat‚ the initial portion of the bore‚ require careful attention during cleaning․ These areas accumulate significant fouling from combustion gases and bullet passage‚ demanding thorough solvent application and brush work․
A bore guide is particularly beneficial here‚ as it properly aligns the cleaning rod with the bore‚ preventing it from impacting the chamber walls or the throat’s sensitive rifling․ Some shooters avoid pulling a brush back through the chamber entirely‚ and a bore guide facilitates this technique․
Protecting these areas is crucial; damage to the chamber can hinder cartridge feeding‚ while throat erosion directly impacts accuracy․ Utilizing a bore guide minimizes the risk of such damage‚ ensuring a smooth and effective cleaning process‚ and preserving the rifle’s functionality․
Crown Protection During Cleaning
The rifle crown‚ the muzzle’s exterior‚ is arguably the most critical area to protect during cleaning․ Damage to the crown – even microscopic imperfections – can drastically degrade accuracy by disrupting the bullet’s departure from the barrel․
A bore guide plays a vital role in crown protection by ensuring the cleaning rod remains perfectly aligned within the bore․ This prevents the rod‚ brush‚ or patches from contacting and potentially damaging the delicate crown edges․
Without a bore guide‚ the cleaning rod can wander‚ increasing the risk of crown damage․ Precision shooters often emphasize avoiding pulling a brush completely through the crown‚ a practice easily facilitated by a properly used bore guide․ Maintaining a pristine crown is paramount for consistent‚ long-range accuracy․

Using a Bore Guide: Step-by-Step
Begin by carefully inserting the bore guide into the chamber‚ ensuring a snug fit․ Then‚ gently guide the cleaning rod through the guide‚ maintaining alignment․
Proper insertion prevents rod contact with the rifling and safeguards the crown during the entire cleaning operation․
Inserting the Bore Guide Correctly
Proper insertion of a bore guide is paramount for effective and safe rifle cleaning․ Begin by ensuring the chamber is clear and the action is open․ Gently introduce the bore guide into the chamber‚ rotating it slightly if needed to facilitate a smooth entry․
The guide should seat fully‚ creating a secure and aligned pathway for the cleaning rod․ Avoid forcing the guide‚ as this could potentially damage the chamber or crown․ A snug fit is ideal‚ preventing solvent from bypassing the bore and potentially harming exterior components․
Some guides feature a rear section designed to protect the throat; ensure this section is properly positioned․ Remember‚ the bore guide’s primary function is to align the cleaning rod and shield the delicate crown from damage during brushing and patching․
Guiding the Cleaning Rod
With the bore guide securely seated‚ carefully insert the cleaning rod through the guide’s central channel․ Maintain a straight and consistent trajectory throughout the entire cleaning stroke‚ relying on the guide to ensure proper alignment․
Avoid angling or bending the rod‚ as this can cause it to contact the rifling‚ potentially leading to wear or damage․ The bore guide acts as a stabilizing force‚ minimizing friction and maximizing cleaning efficiency․

Slow‚ deliberate movements are crucial; rushing the process can compromise accuracy and increase the risk of harm․ As you push and pull the rod‚ observe the guide to confirm it remains stable and centered within the bore․ This technique protects the crown and ensures thorough cleaning․
Preventing Damage to the Crown
The rifle crown‚ the muzzle’s final section‚ is exceptionally vulnerable to damage during cleaning․ A bore guide is paramount in safeguarding this critical area‚ preventing the cleaning rod from impacting or scraping the delicate rifling․
Many precision shooters refrain from pulling a brush back through the crown‚ recognizing the potential for harm․ The bore guide extends protection to the muzzle‚ eliminating this risk entirely․ It acts as a physical barrier‚ ensuring the rod remains centered and avoids contact․
Consistent use of a bore guide preserves the crown’s integrity‚ maintaining accuracy and preventing potential long-term performance degradation․ Protecting the crown is a fundamental aspect of responsible rifle maintenance․

Cleaning Procedures
Begin with solvent application‚ followed by controlled brush strokes—forward and backward—guided by the bore guide for optimal cleaning efficiency and rod alignment․
Thorough patching removes solvent and loosened fouling‚ while specialized techniques address stubborn copper buildup‚ ensuring a pristine bore․
Initial Solvent Application
Commencing the cleaning process requires generous solvent application to thoroughly saturate the rifle bore‚ dissolving powder residue and initial fouling buildup․ Utilizing a bore guide during this stage is paramount; it ensures the solvent reaches all areas of the bore‚ preventing bypass and maximizing its effectiveness․
The bore guide’s tight fit seals around the chamber and prevents solvent from contacting the action‚ protecting sensitive components․ Allow sufficient dwell time – typically 10-15 minutes – for the solvent to work‚ loosening contaminants before proceeding to the brushing stage․
This initial soak is crucial for effortless cleaning and minimizes the need for aggressive scrubbing‚ preserving the integrity of the rifle’s bore․ Remember to select a solvent appropriate for your rifle’s specific needs and the type of ammunition used․
Brush Work: Forward and Backward Strokes
Employing a bore brush‚ guided by the bore guide‚ is the next critical step in rifle cleaning․ Initiate with slow‚ controlled forward strokes‚ ensuring the brush fully traverses the bore’s length․ Avoid reversing the brush within the bore; instead‚ completely exit the muzzle before pulling it back through․
This prevents pushing fouling back into the bore and ensures consistent cleaning․ The bore guide maintains perfect alignment‚ safeguarding the rifling from damage caused by an improperly directed brush․ Repeat this process 10-15 times‚ depending on the level of fouling․
Maintain consistent pressure and solvent lubrication throughout․ Some shooters avoid pulling the brush back through the crown‚ opting to stop just before exit‚ further protecting this critical area․
Patching and Solvent Removal
Following brush work‚ patching is essential for removing loosened fouling and residual solvent․ Utilize appropriately sized patches‚ snugly fitted onto a jag or slotted patch holder‚ and guided by the bore guide for consistent passage․ Begin with solvent-soaked patches‚ pushing them completely through the bore․
Continue with clean‚ dry patches until they emerge spotless‚ indicating thorough solvent removal․ The bore guide ensures the patch travels straight‚ preventing friction against the rifling․ Inspect each patch for fouling levels‚ adjusting the patching frequency as needed․
This process confirms effective cleaning and prepares the bore for lubrication or storage․ A clean bore is a happy bore‚ and the bore guide aids in achieving optimal results․
Copper Fouling Removal Techniques
Copper fouling‚ a byproduct of cartridge brass‚ necessitates specialized removal techniques․ Utilizing a bore guide during this process is paramount for even application and protection․ Options include dedicated copper solvents like Hoppe’s No․ 9 or specialized chelation solutions․
Aggressive methods‚ such as JB Bore Paste‚ require careful application guided by the bore guide to avoid altering the bore’s dimensions․ CLR (Calcium‚ Lime‚ Rust remover) is another option‚ but requires thorough rinsing afterward․
Employing a consistent‚ methodical approach‚ guided by the bore guide‚ ensures complete copper removal without damaging the rifling․ Patience and proper technique are key to restoring accuracy․

Advanced Cleaning Techniques
Employing JB Bore Paste or CLR demands precision; a bore guide ensures even application and prevents damage‚ restoring optimal bore condition for peak accuracy․
Hooping and patching methods‚ when paired with a bore guide‚ deliver superior solvent distribution and thorough cleaning for demanding applications․
Using JB Bore Paste
JB Bore Paste‚ a highly abrasive compound‚ effectively removes stubborn copper fouling and lead deposits‚ restoring a rifle bore to like-new condition․ However‚ its abrasive nature necessitates careful application and a stable cleaning platform – this is where a bore guide becomes invaluable․
A bore guide prevents the cleaning rod from contacting the rifling‚ especially crucial when using an abrasive like JB‚ minimizing the risk of inducing wear or altering the bore’s dimensions․ Apply a small amount of JB to a properly sized patch or bronze brush‚ and utilize the bore guide to ensure even distribution throughout the bore․
Work the paste through the bore with controlled‚ consistent strokes‚ following the manufacturer’s instructions regarding dwell time and number of passes․ Thoroughly patch out all traces of JB with clean solvent‚ again guided by the bore guide‚ to avoid residue buildup that could affect future accuracy․ Remember‚ JB is a restorative‚ not a routine cleaning agent․
CLR for Copper Fouling
CLR (Calcium‚ Lime‚ Rust Remover)‚ surprisingly‚ is a popular and cost-effective solution for dissolving copper fouling in rifle bores․ However‚ its effectiveness relies on thorough application and dwell time‚ and a bore guide significantly enhances this process․ Utilizing a bore guide ensures the CLR solution reaches all areas of the bore‚ maximizing its cleaning potential․
Insert the bore guide securely‚ then saturate a patch with CLR and push it through the bore‚ guided by the rod․ Allow ample dwell time – often several hours‚ or even overnight – for the CLR to react with the copper deposits․ A bore guide prevents leakage and maintains consistent contact․
Follow with thorough patching using clean solvent and a bore guide to remove dissolved copper and CLR residue․ Repeat as needed until patches come out clean‚ indicating complete copper removal․ Always wear appropriate safety gear when handling CLR;
Hooping and Patching Methods
Hooping‚ or looping‚ patches onto a jag or slotted patch holder‚ is a traditional method for applying solvents and cleaning agents within a rifle bore․ When combined with a bore guide‚ this technique becomes even more precise and effective․ The bore guide ensures the patch travels straight‚ maximizing contact with the bore’s surface and preventing solvent bypass․
Securely insert the bore guide‚ then attach a properly sized patch to the jag․ Gently push the patch through the bore‚ guided by the cleaning rod and bore guide‚ using consistent pressure․ Avoid forcing the patch‚ as this can damage the rifling․
Follow with clean patches until they emerge spotless‚ indicating complete solvent and fouling removal․ A bore guide minimizes the risk of patch edges contacting the crown‚ preserving accuracy․
Bore Guide Selection and Maintenance
Choosing the right bore guide—universal or caliber-specific—is crucial for a secure fit and optimal cleaning․ Regular cleaning and proper storage extend its lifespan․
Durable materials like aluminum or high-strength polymers ensure longevity‚ while careful handling prevents damage and maintains cleaning precision․
Universal vs․ Caliber-Specific Guides
Selecting between a universal and caliber-specific bore guide depends on your rifle collection and cleaning frequency․ Universal guides‚ like those from Tipton‚ accommodate a wide range of calibers using interchangeable bushings․
This versatility is cost-effective for owners with diverse firearms‚ but may not offer the precise fit of a dedicated‚ caliber-specific guide․ Caliber-specific guides‚ conversely‚ are engineered for a single caliber‚ ensuring a snug‚ secure fit within the bore․
This tighter fit minimizes the risk of the guide shifting during cleaning‚ potentially damaging the crown or rifling․ Precision shooters often prefer caliber-specific guides for this reason‚ prioritizing accuracy and protection․
However‚ investing in a separate guide for each caliber can become expensive․ Consider your budget‚ the number of rifles you own‚ and your desired level of precision when making your choice․
Materials and Durability
Bore guide materials significantly impact their longevity and performance․ Most guides utilize a combination of materials‚ with the guide body often constructed from durable polymers or aluminum․
Polymer guides are lightweight and resistant to solvents‚ but may be less rigid than aluminum․ Aluminum guides offer superior rigidity‚ ensuring precise alignment‚ but can be susceptible to corrosion if not properly maintained․
The bushings‚ which interface with the bore‚ are typically made from brass or stainless steel‚ chosen for their resistance to wear and corrosion․ Look for guides with high-quality bushings to prevent damage to your rifle’s bore․
Durability is crucial; a well-made guide should withstand repeated use and exposure to harsh cleaning solvents without cracking‚ warping‚ or exhibiting signs of wear․
Cleaning and Storing Your Bore Guide
Proper maintenance extends the life of your bore guide and ensures optimal performance․ After each use‚ thoroughly clean the guide with a solvent-safe cloth to remove any residual cleaning solutions or fouling․
Pay particular attention to the bushings‚ ensuring they are free of debris․ Avoid abrasive cleaners that could damage the guide’s surface․ Inspect the guide for any signs of wear or damage‚ such as cracks or warping․
When storing‚ keep the bore guide in a clean‚ dry place‚ away from extreme temperatures and direct sunlight․ A dedicated case or pouch is ideal for protecting it from scratches and dust․
Proper storage prevents corrosion and maintains the guide’s precise fit‚ guaranteeing continued accuracy and protecting your rifle’s bore during future cleaning sessions․